

Basic Setup Terraform for AWS on GitHub Codespaces
A basic guide to manually setting up Terraform environment for AWS in GitHub Codespaces.


Table of contents
- Exploring AWS, Terraform, and GitHub Codespaces 🔍
- Get Started 🚀
- Step 1: Create a Codespace on a branch in a GitHub repository.
- Step 2: Install Terraform CLI in the Codespace
- Step 3: Install AWS CLI
- Step 4: Sign up for a new AWS account if not available yet
- Step 5: Create a new IAM User for Terraform development
- Step 6: Create access keys for the IAM User
- Step 7: Configure AWS CLI
- Step 8: Install the Terraform Extension for VS Code
- Step 9: Define AWS infrastructure in Terraform configuration file
- Step 10: Create AWS infrastructure
- Verify the result ✅
- Clean up 🧹
- Conclusion 🏁
- References 🔗
In this post, I'll start my journey with Terraform on AWS as part of my decision to create a portfolio showcasing my experiences. With nearly three years of Terraform expertise under my belt, I've realized the importance of flexibility in development. Whether I'm on my iPad Air or laptop, being able to develop Terraform code from any machine is invaluable. This led me to explore setting up a basic Terraform environment in GitHub Codespaces, starting with a manual approach to understand its foundations before diving into more advanced setups.
Embarking on this journey, we'll navigate the basic concept of AWS, Terraform, and GitHub Codespaces. Starting by setting up our GitHub Codespace environment, we'll then streamline the creation of a simple AWS infrastructure using Terraform. Finally, we'll explore a one-step cleanup process for these resources.
Join me in simplifying infrastructure management with Terraform and GitHub Codespaces, wherever creativity takes you 😉.
Exploring AWS, Terraform, and GitHub Codespaces 🔍
What is AWS?
AWS (Amazon Web Services) is one of the Amazon's cloud computing platform, offering a wide range of services like computing power, storage, networking, databases, machine learning, AI, and more. Primarily, it allows businesses to grow without the need for costly upfront infrastructure investments, offering flexibility and cost-effectiveness. You can explore the full range of benefits AWS offers businesses by clicking on this link.
What is Terraform?
Terraform, created by HashiCorp, is an open-source tool for managing infrastructure as code. It lets users define and provision resources using a simple configuration language, called HCL (HashiCorp configuration language). With Terraform, you can manage your infrastructure through code, enabling version control, collaboration, and automation. It supports multiple cloud providers like AWS, Azure, and Google Cloud, making it adaptable for various environments.
What is GitHub Codespaces?
GitHub Codespaces offers cloud-hosted development environments for coding from anywhere via any web browser, seemingly integrating with GitHub repositories. It eliminates the need for local setups, enabling developers to work on projects from any device with internet access, including my iPad Air 😎.
Get Started 🚀
Step 1: Create a Codespace on a branch in a GitHub repository.
Open your browser, go to https://github.com/login and login to your GitHub account.
Browse to a repository where you’d like to create the Codespace from. Press "Code" button, select the "Codespaces" tab, and press "Create codespace on main" button to let GitHub initiate a Codespace VS Code environment based on your main branch.
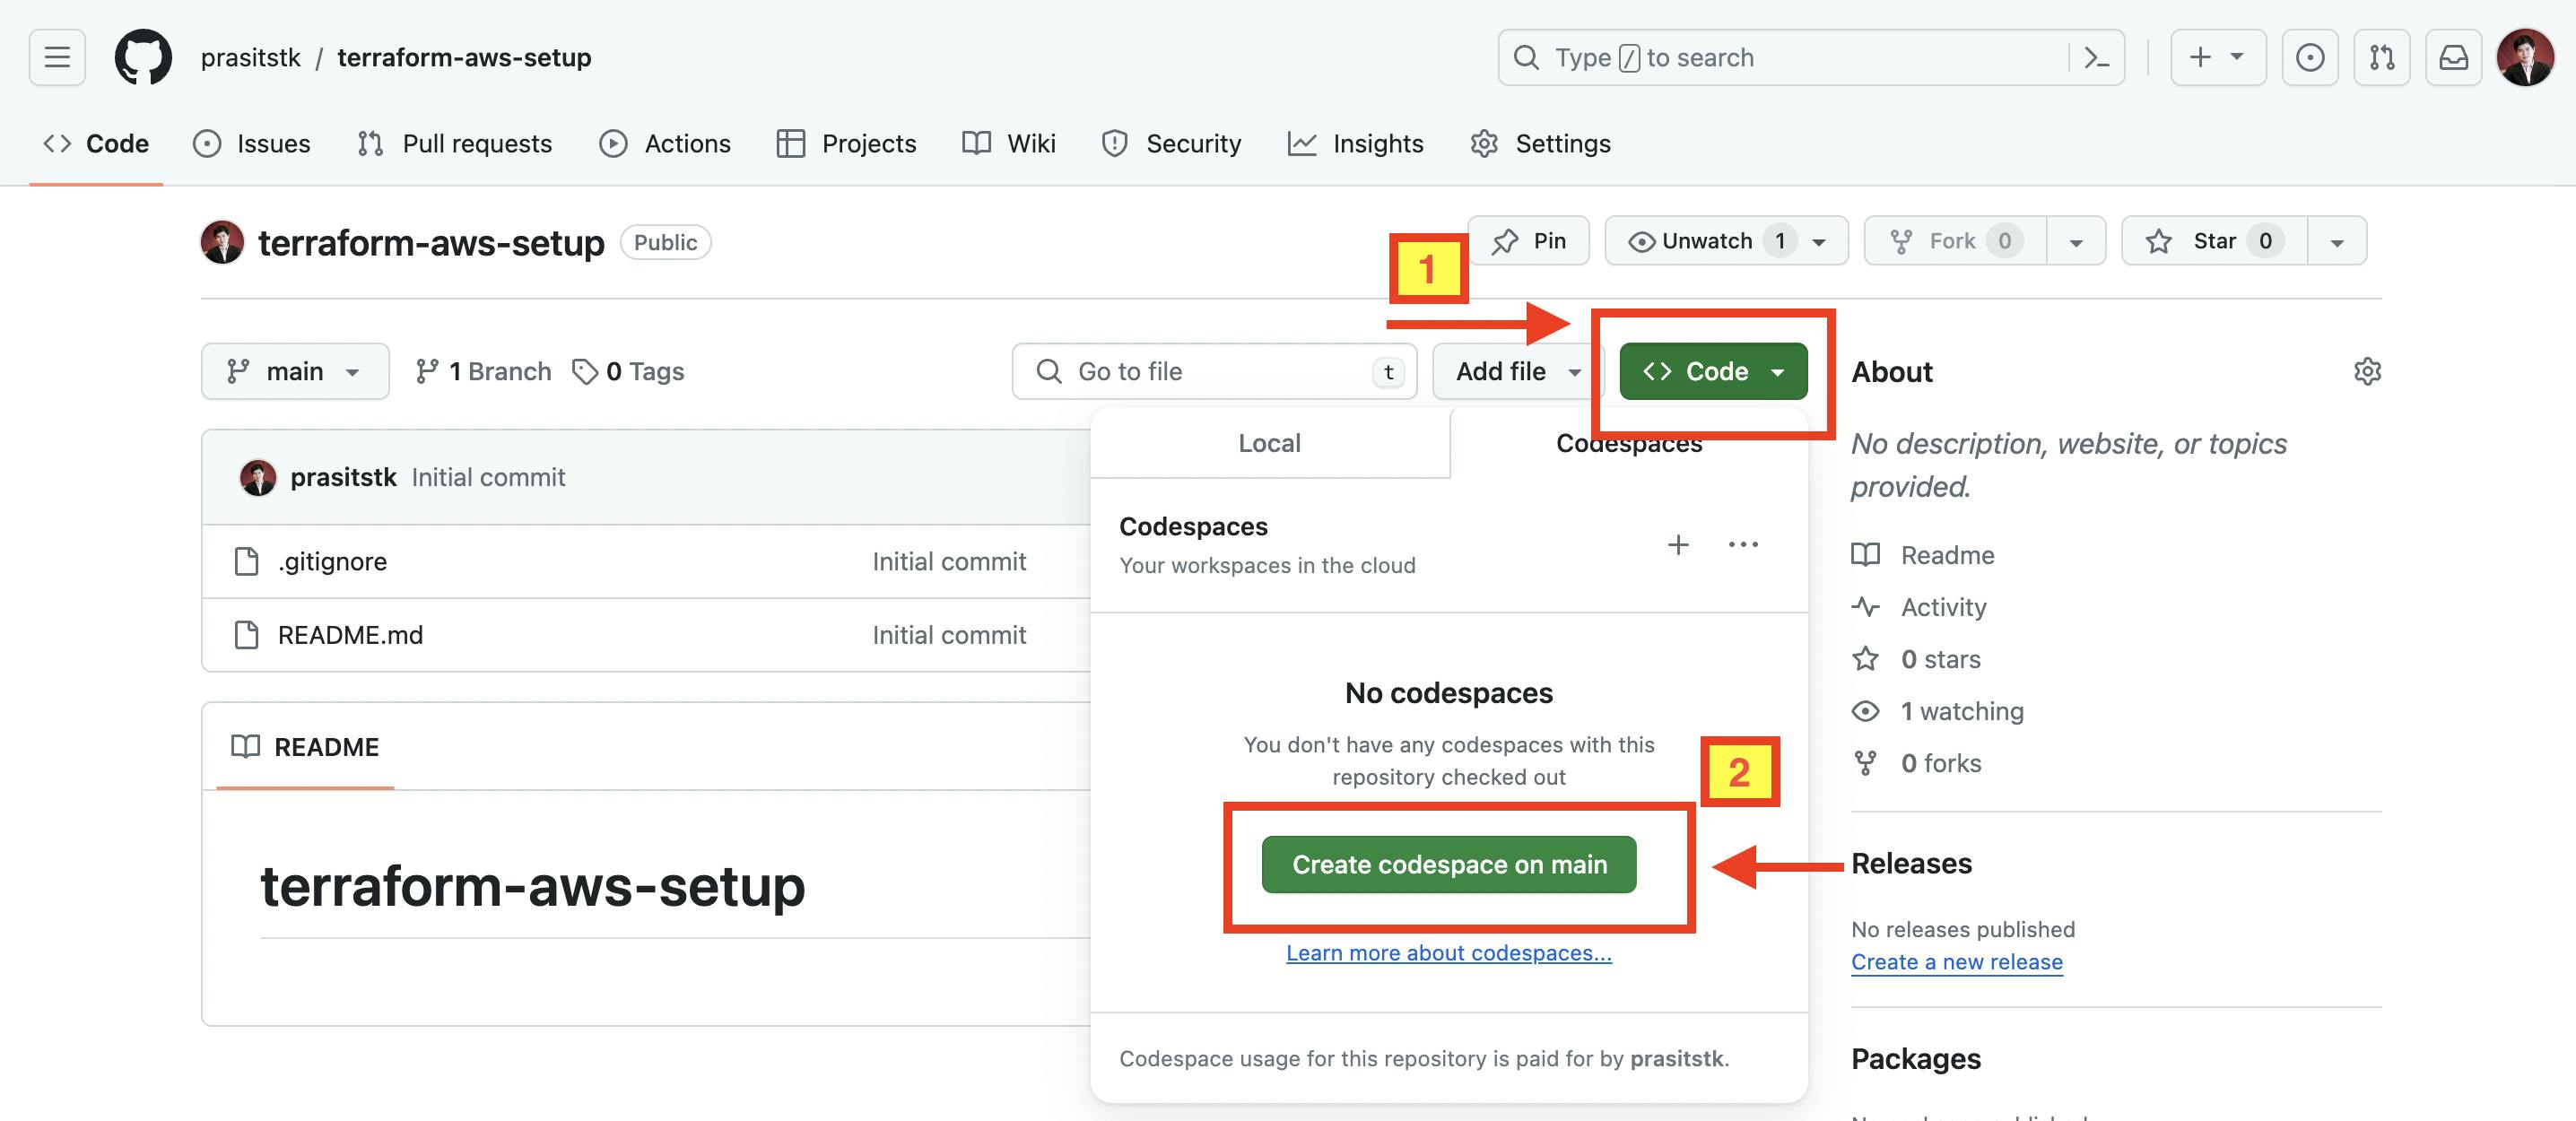
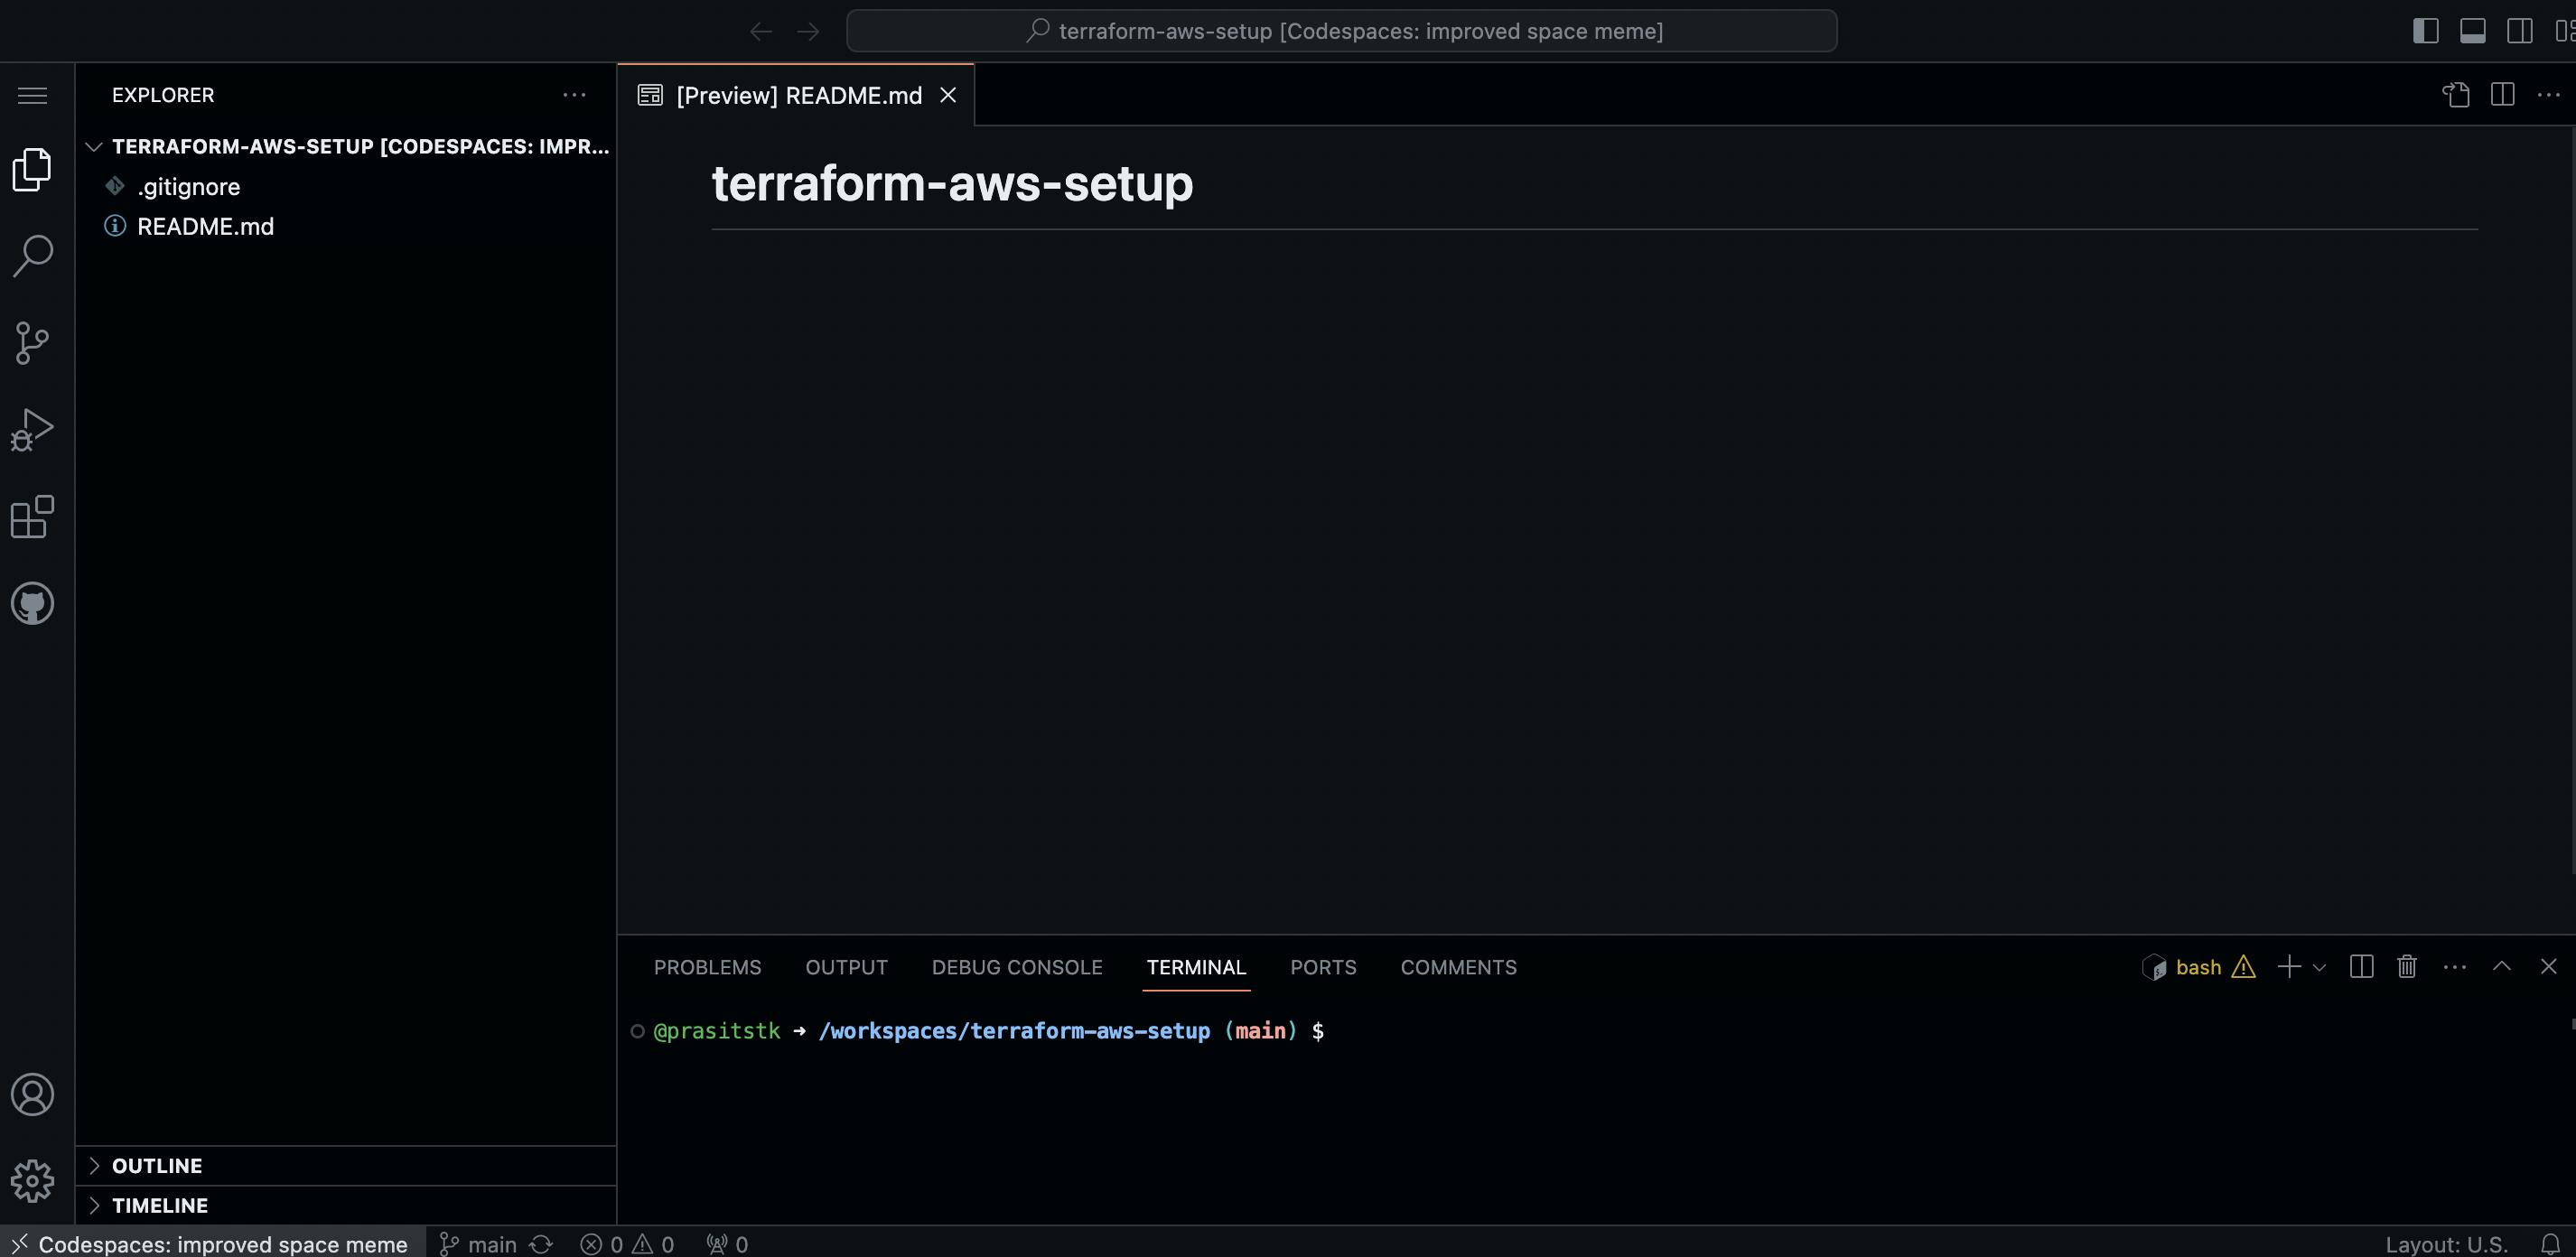
Within a few seconds your GitHub Codespace should be launched in the new browser tab as follows:
Step 2: Install Terraform CLI in the Codespace
First, check the OS release of the Codespace by typing the command cat /etc/os-release on the "Terminal" tab as follows:
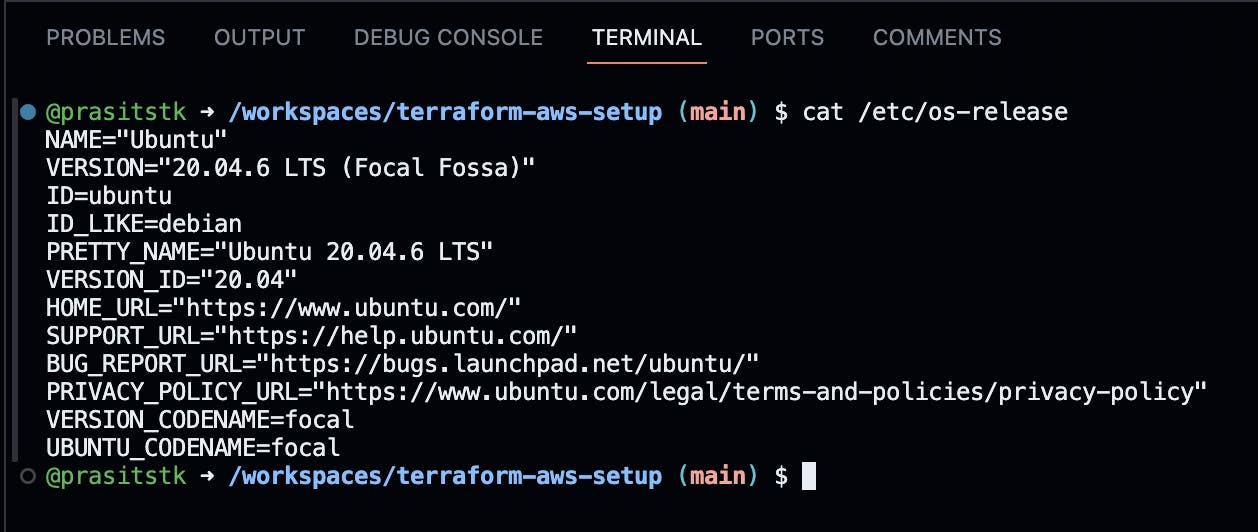
For me, it shows "Ubuntu 20.04.6 LTS". Actually I do this because I would like to make sure that I select the correct Terraform installation commands from the web page here:
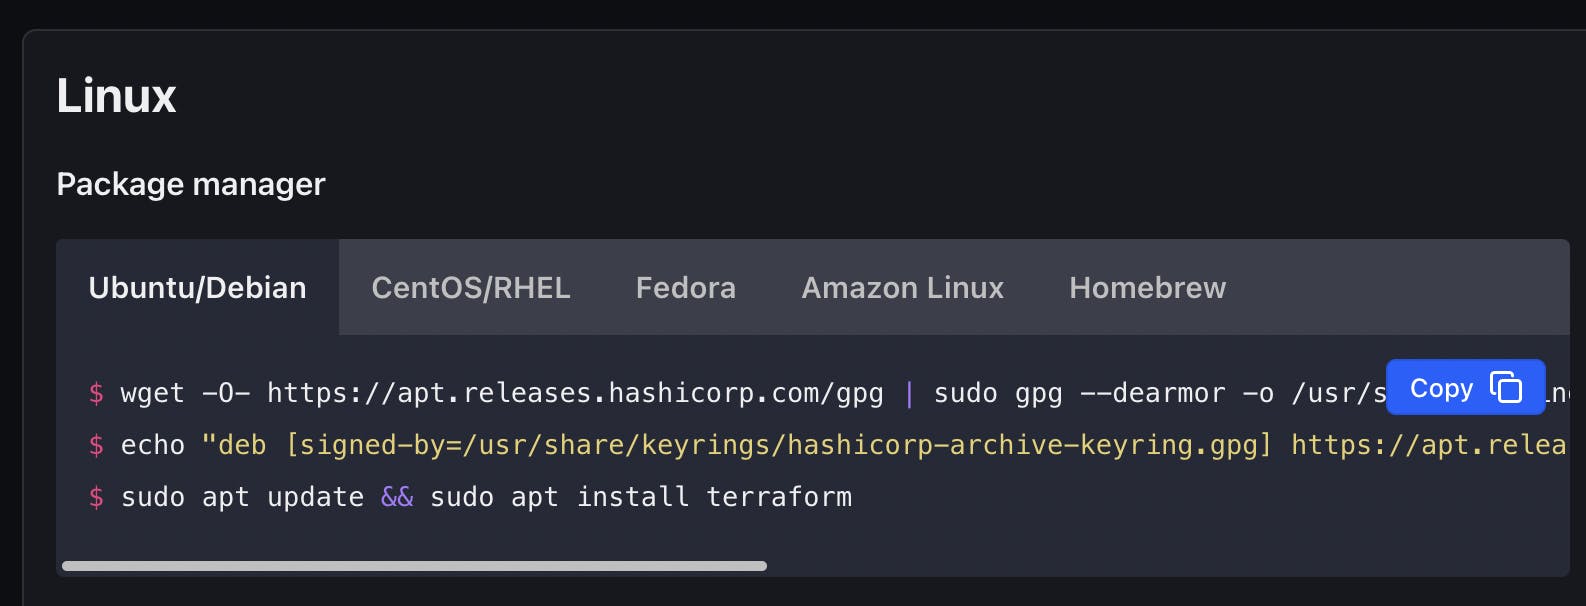
Based on my OS release of my Codespace, I will copy the commands on the "Ubuntu/Debian" tab and press on the "Terminal" tab on my Codespace VS Code and run all of them to install the Terraform CLI (Command Line Interface) as follows:
# Installation commands for Ubuntu/Debian
wget -O- https://apt.releases.hashicorp.com/gpg | sudo gpg --dearmor -o /usr/share/keyrings/hashicorp-archive-keyring.gpg
echo "deb [signed-by=/usr/share/keyrings/hashicorp-archive-keyring.gpg] https://apt.releases.hashicorp.com $(lsb_release -cs) main" | sudo tee /etc/apt/sources.list.d/hashicorp.list
sudo apt update && sudo apt install terraform
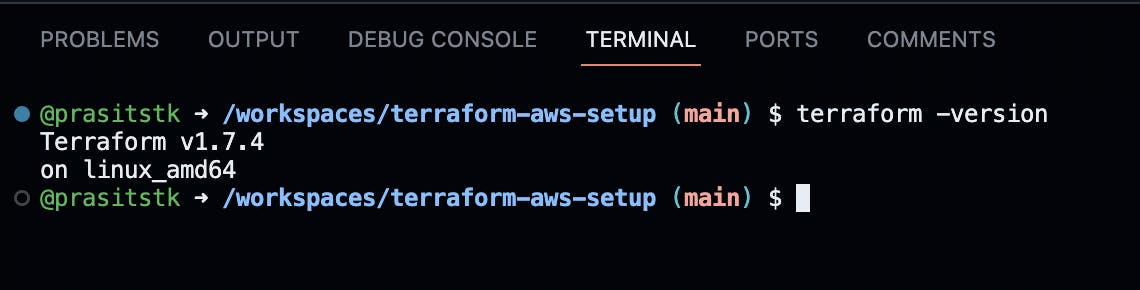
To verify that we install the Terraform CLI successfully, type the terraform -version on the "Terminal" tab, it should display the version of the installed Terraform CLI as follows:
Step 3: Install AWS CLI
Installing the AWS CLI (Command Line Interface) after the Terraform CLI is necessary to enable Terraform to interact with AWS resources effectively. Based on the installation commands from this AWS page on the "Linux" section, run the following commands on the Terminal tab:
# Installation commands for Linux x86 (64-bit)
curl "https://awscli.amazonaws.com/awscli-exe-linux-x86_64.zip" -o "awscliv2.zip"
unzip awscliv2.zip
sudo ./aws/install

# ADDED: Clean up after installation
rm -f awscliv2.zip
rm -rf aws
After the installation is complete, verify the installation of the AWS CLI by typing the command aws --version on the "Terminal" tab, it should show the version of the installed AWS CLI as follows:

Step 4: Sign up for a new AWS account if not available yet
If you already have your own AWS account, skip this step.
If not, create your new AWS account by following the steps here.
Step 5: Create a new IAM User for Terraform development
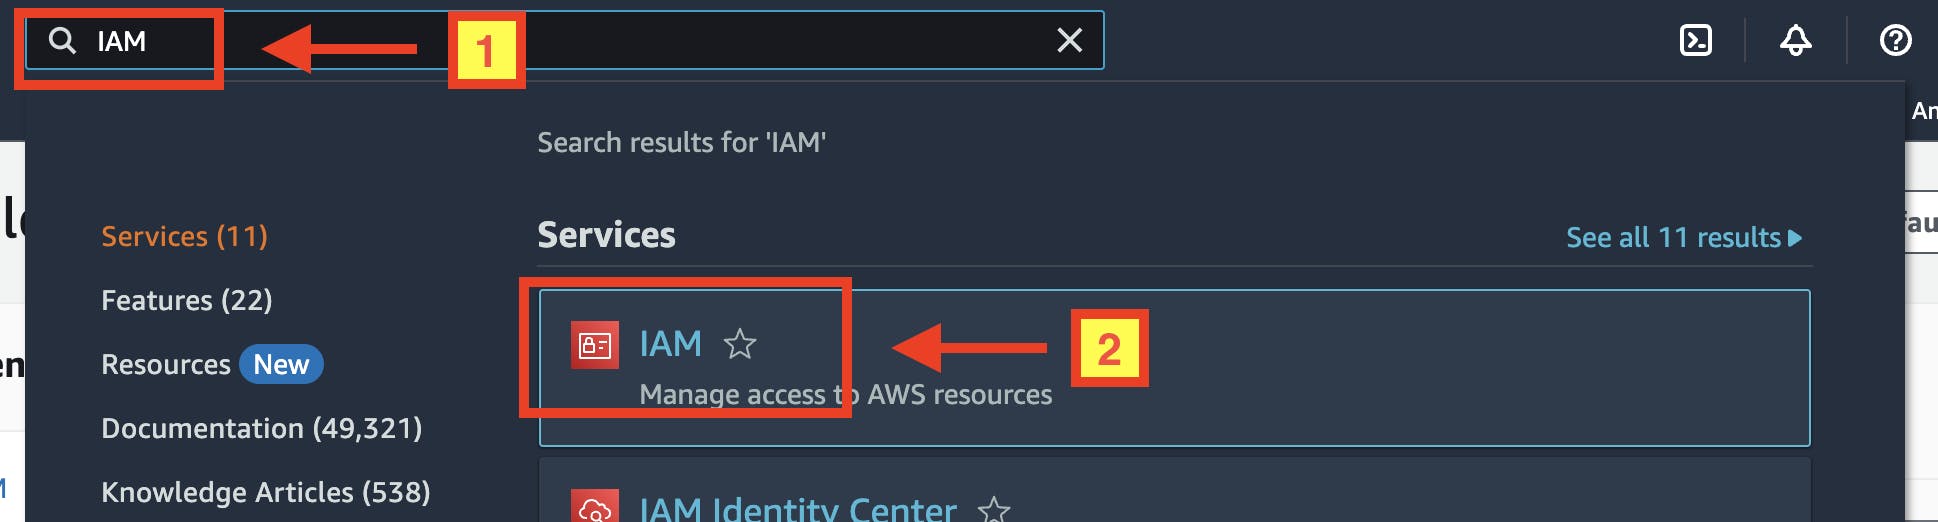
Sign in to your AWS account, then type "IAM" on the search text box at the top to navigate to "IAM Dashboard":
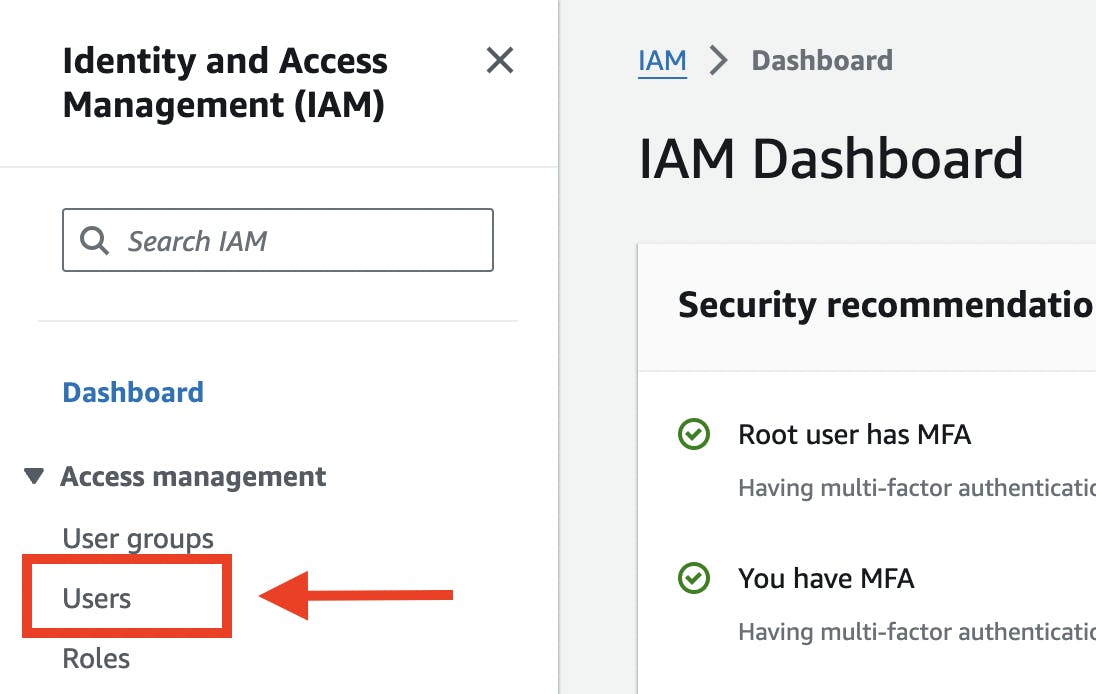
On the left-hand side menu, under the "Access management", click on the "Users" menu link.
On the "IAM Users" page, click the "Create user" button, then provide the information of the new IAM User as follows:
User name: terraform-developer
Attach policies directly > Select AdministratorAccess
BEST PRACTICE 👍
Note that using the AdministratorAccess policy for an IAM user managing AWS resources with Terraform isn't usually recommended. This policy gives full access to all AWS services and resources, which can be risky if the user's credentials are hacked.
Instead, it's better to stick to the principle of least privilege. Only give IAM users the permissions they really need, like creating or changing certain resources. This makes things safer and reduces the chance of someone getting into your AWS resources without permission.
Step 6: Create access keys for the IAM User
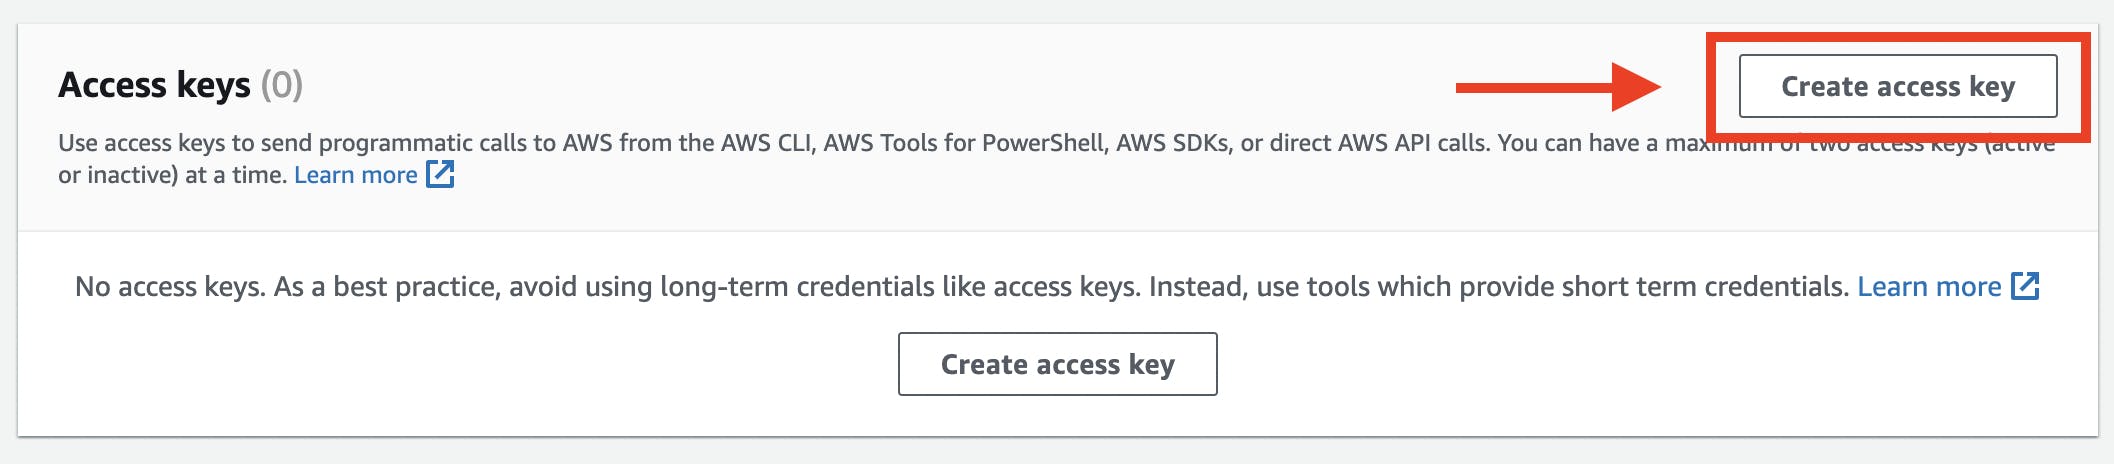
From "IAM Users" page, select terraform-developer IAM User we've just created, scroll down until you see the "Access keys" box, then press "Create access key" button as follows:
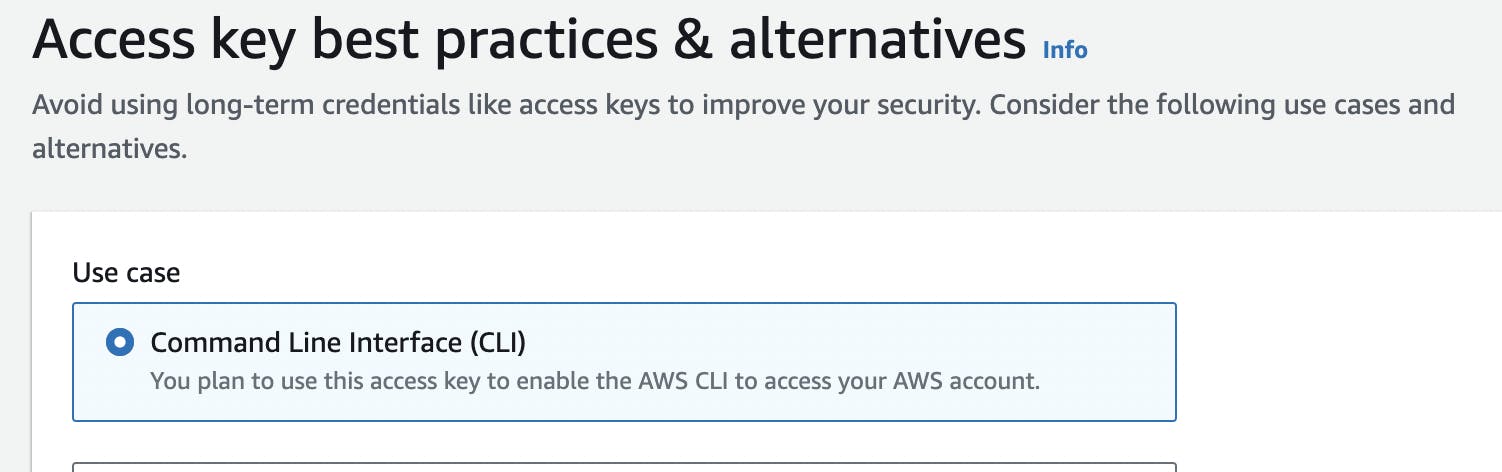
Select the "Use case" as "Command Line Interface (CLI)", acknowledge the warning below, and click "Next" button below as follows:
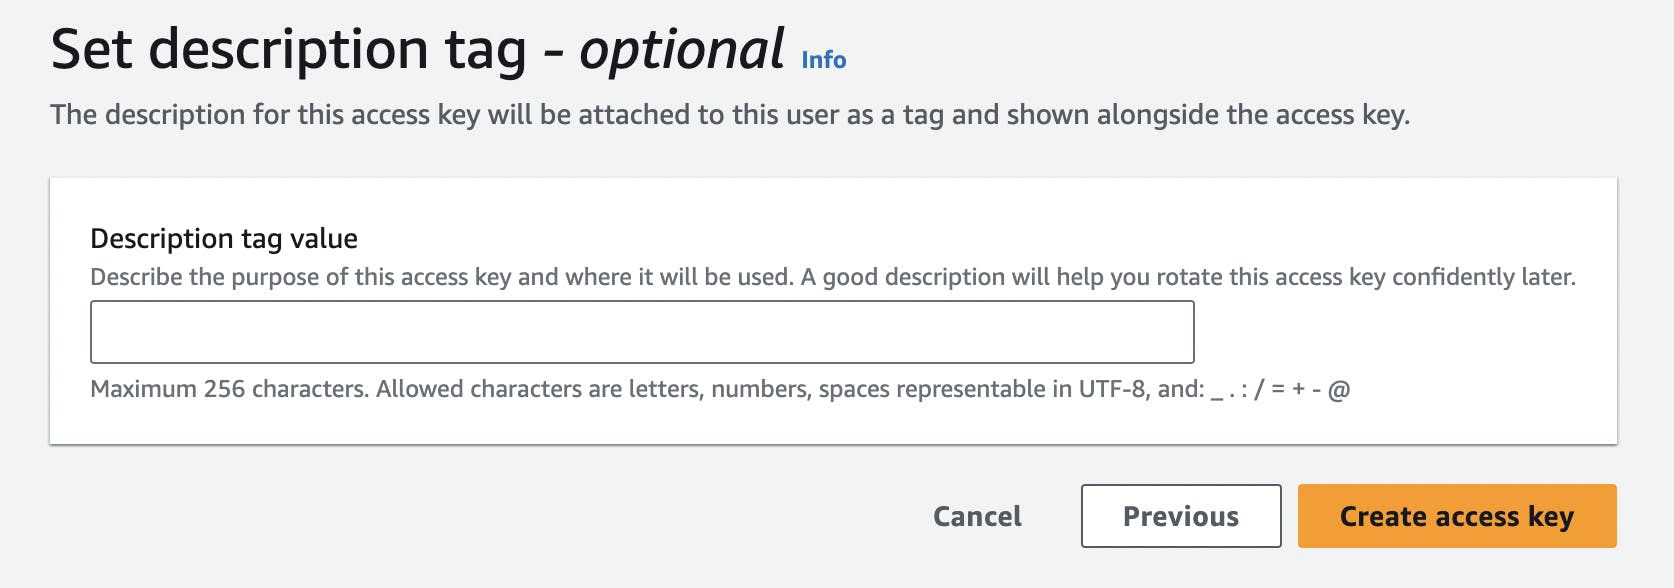
Optionally set the description tag, then click "Create access key" button below.
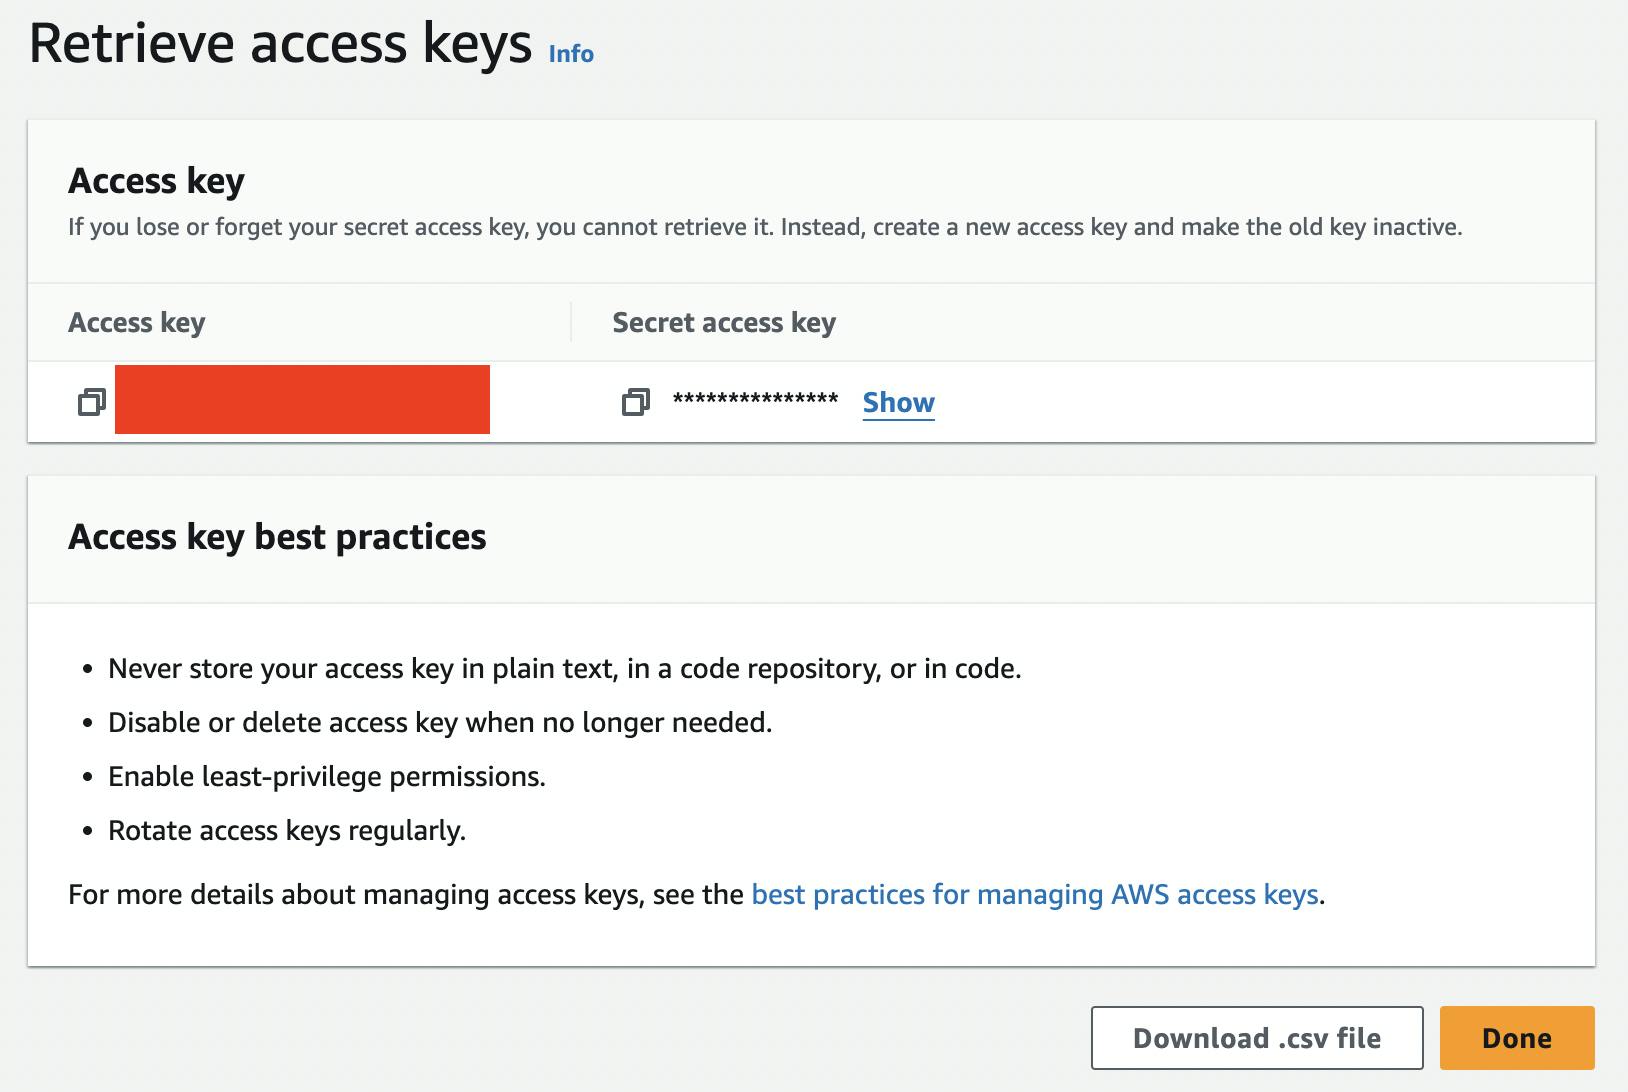
Your access key and secret access key now have been successfully generated. It's important to note that once you click the "Done" button below, you won't be able to access this "Retrieve access keys" page again. Be sure to copy or download these keys securely, as they won't be accessible later.
Step 7: Configure AWS CLI
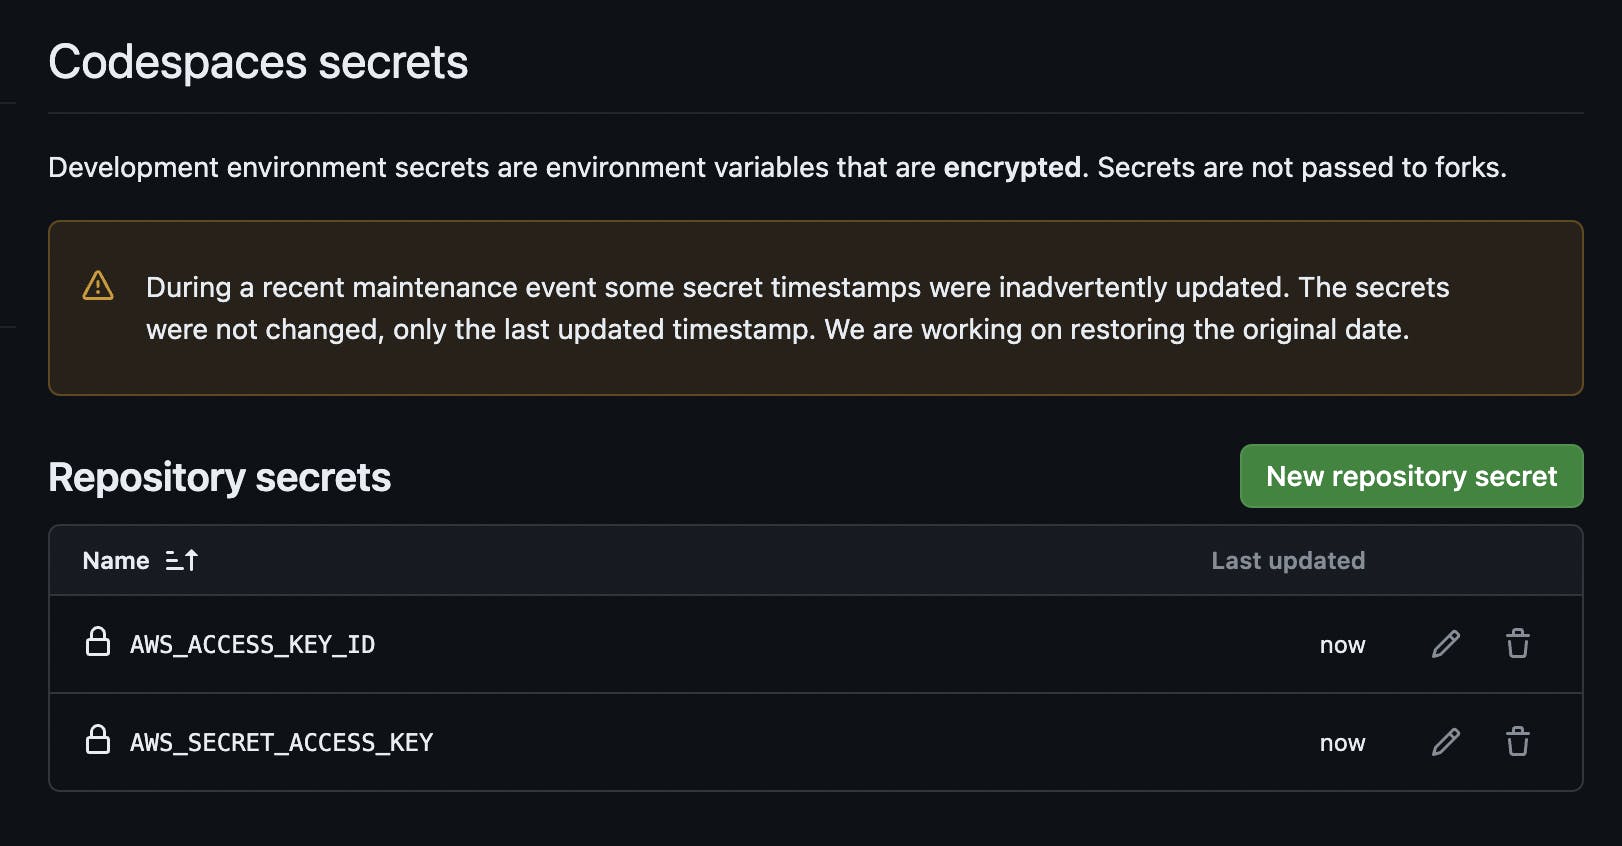
To enable Terraform CLI for AWS resource management, configure your AWS credentials using the access keys generated earlier. Set AWS_ACCESS_KEY_ID and AWS_SECRET_ACCESS_KEY environment variables in your GitHub Codespace Terminal session. To do this, navigate to your repository "Settings > Secrets and variables > Codespace", and create new repository secrets with the following details:
AWS_ACCESS_KEY_ID = <Access key>
AWS_SECRET_ACCESS_KEY =*<Secret access key>*

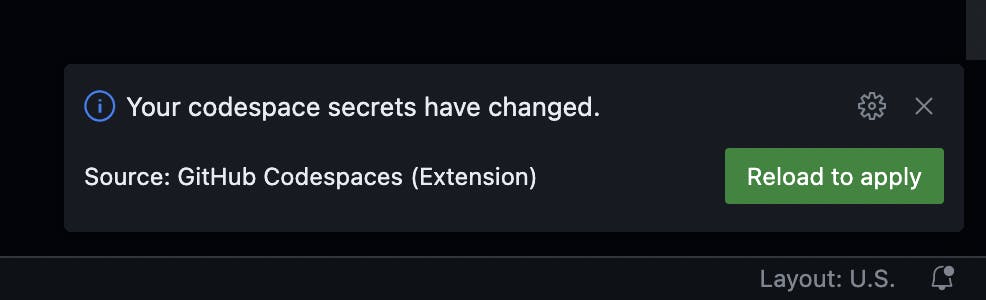
After configuring these secrets, your Codespace will automatically detect them. You'll receive a notification in your Codespace stating, "Your codespace secrets have changed. Reload to apply." Simply click the 'Reload to apply' button for the changes to take effect.
After the Codespace reloads, access keys for AWS CLI are configured. Terraform CLI is now effectively authorized to manage AWS resources using the terraform-developer IAM User. We're all set to define and create our AWS infrastructure.
IMPORTANT 🔐
Note that AWS credentials or any secrets stored in the "Repository secrets" setting are shared with all GitHub collaborators. For privacy, store them in your personal "Codespaces secrets" setting instead.
Reference: Managing your account-specific secrets for GitHub Codespaces
Step 8: Install the Terraform Extension for VS Code
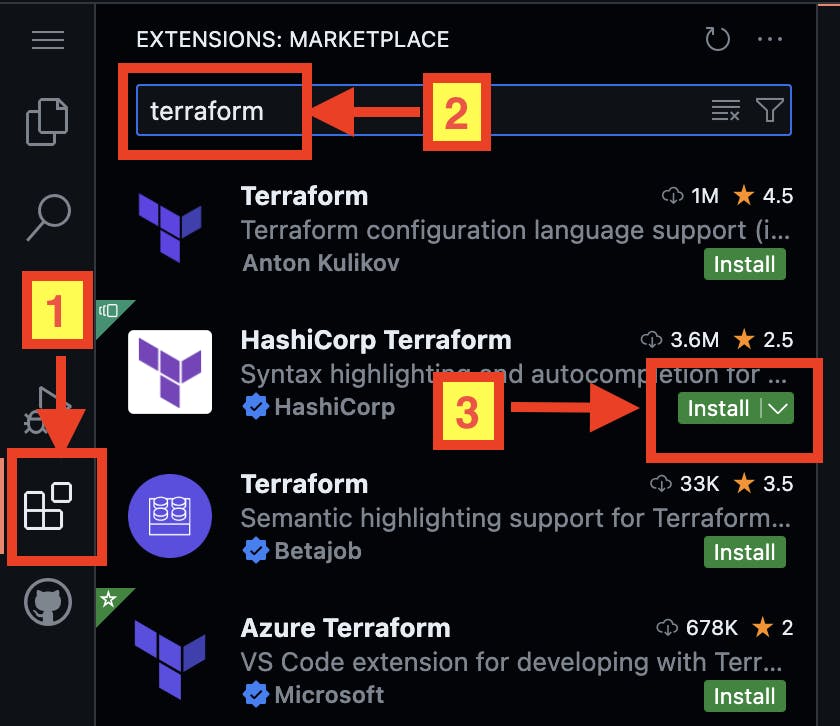
On your Codespace, install the Terraform extension for VS Code by:
Select "Extensions" menu on the left-hand side.
Search for the "terraform" on the marketplace.
Press "Install" button on the "HashiCorp Terraform" extension.
Step 9: Define AWS infrastructure in Terraform configuration file
In the root directory of the Codespace, create a file named main.tf to define our AWS infrastructure using HCL (HashiCorp Configuration Language).
In main.tf, add the following code to create a basic Amazon VPC (Virtual Private Cloud) virtual network. Remember, creating a VPC incurs no cost, but it's recommended to clean it up afterward.
terraform {
  required_providers {
    aws = {
      source  = "hashicorp/aws"
      version = "~> 5.0"
    }
  }
}

provider "aws" {
  region = "ap-southeast-1"
}

resource "aws_vpc" "example_vpc" {
  cidr_block = "10.0.0.0/16"
}
The Terraform code provided above is from the example on the AWS Provider page linked here.
We can explain each block in the code as follows:
terraform {
  required_providers {
    aws = {
      source  = "hashicorp/aws"
      version = "~> 5.0"
    }
  }
}
- The
terraformblock specifies the required AWS provider. AWS provider is a Terraform plugin that enables Terraform to interact with a specific service or technology platform, such as AWS, or Azure. This block will also map its local provider name calledawsto a source address"hashicorp/aws"and a version constraint"~> 5.0".
provider "aws" {
  region = "ap-southeast-1"
}
- The
provider "aws"block will configure the AWS Provider with default region of Singapore ("ap-southeast-1"). Note that the default region in this block is only optional. You can define it by eitherAWS_REGIONorAWS_DEFAULT_REGIONenvironment variable withap-southeast-1value through Secrets and variables setting from step 7 as well.
resource "aws_vpc" "example_vpc" {
  cidr_block = "10.0.0.0/16"
}
- This
resourceblock defines a VPC resource (by"aws_vpc"resource type) named"example_vpc"with IPv4 CIDR block of"10.0.0.0/16".
Step 10: Create AWS infrastructure
Now we have our configuration file to define our AWS infrastructure. We will then create the specified AWS resources on your AWS account on behalf of terraform-developer IAM User. Here are the commands to:
- Initialize the Terraform project in the root directory to download the AWS provider plugin and set up the working directory by:
terraform init
- Preview the actions that Terraform will take before applying any changes to the infrastructure by:
terraform plan
- After you're satisfied with the changes proposed by the
terraform plancommand, apply those changes to your AWS account by:
terraform apply
Note that Terraform will prompt you to confirm applying the changes. Simply type
yesand press Enter to proceed.
Verify the result ✅
Sign in to your AWS account.
On the AWS console, type "VPC" on the top search bar and click "VPC" link as follows:
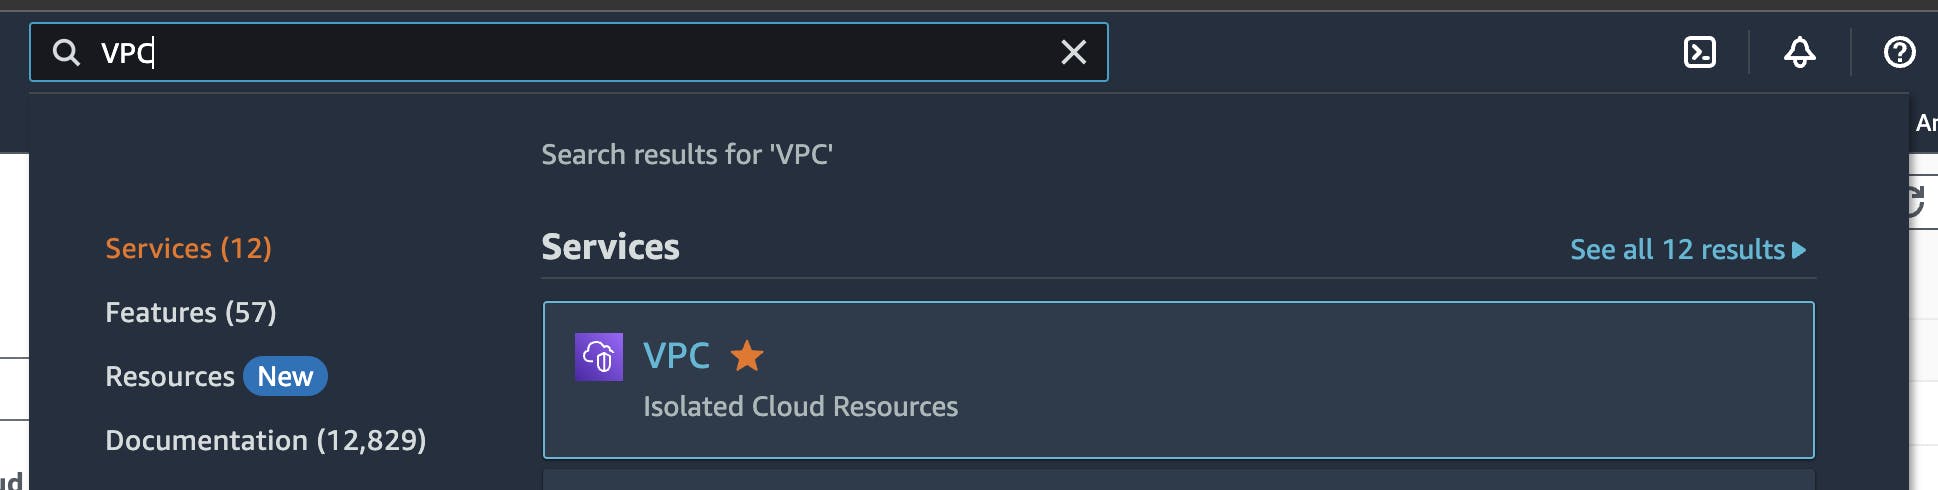
- Click "Your VPCs" menu, then you should see the newly created VPC whose IPv4 CIDR is "10.0.0.0/16" as specified in the Terraform code as follows:
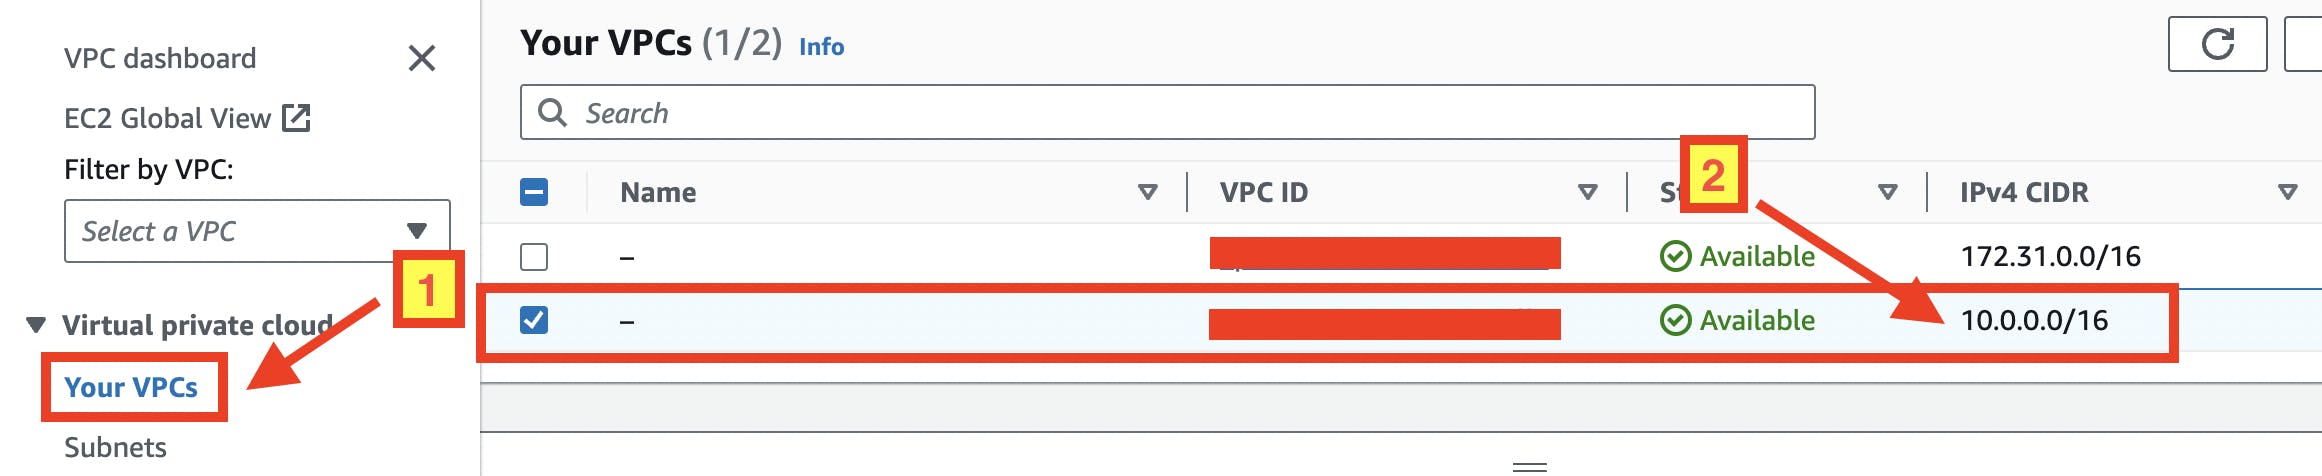
If you see the new VPC on your VPC console, congratulations 🎉🎉🎉! You’ve successfully applied and managed your infrastructure as code using Terraform for AWS on GitHub Codespaces, even on the go 🚶🏻.
Clean up 🧹
After experimenting with Terraform, it's crucial to clean up your resources to avoid unexpected costs. To destroy the resources created earlier, run:
terraform destroy
Terraform will request confirmation before destroying the resources. Type
yesand press Enter to proceed.
Conclusion 🏁
In this guide, we've navigated the setup of Terraform for AWS on GitHub Codespaces, enabling flexible infrastructure management from any device. By following simple steps, we established our environment, created AWS resources, and verified our setup.
As we finish up, remember that your learning with Terraform and AWS doesn't stop here. Now that you have the basics, you can start trying out more advanced setups and improvements to better manage your infrastructure alongside me 😁.
Keep coding and exploring! 🚀
References 🔗
Terraform
AWS
AWS CLI | Install or update to the latest version of the AWS CLI
AWS Knowledge Center | How do I create and activate a new AWS account?